Introduction
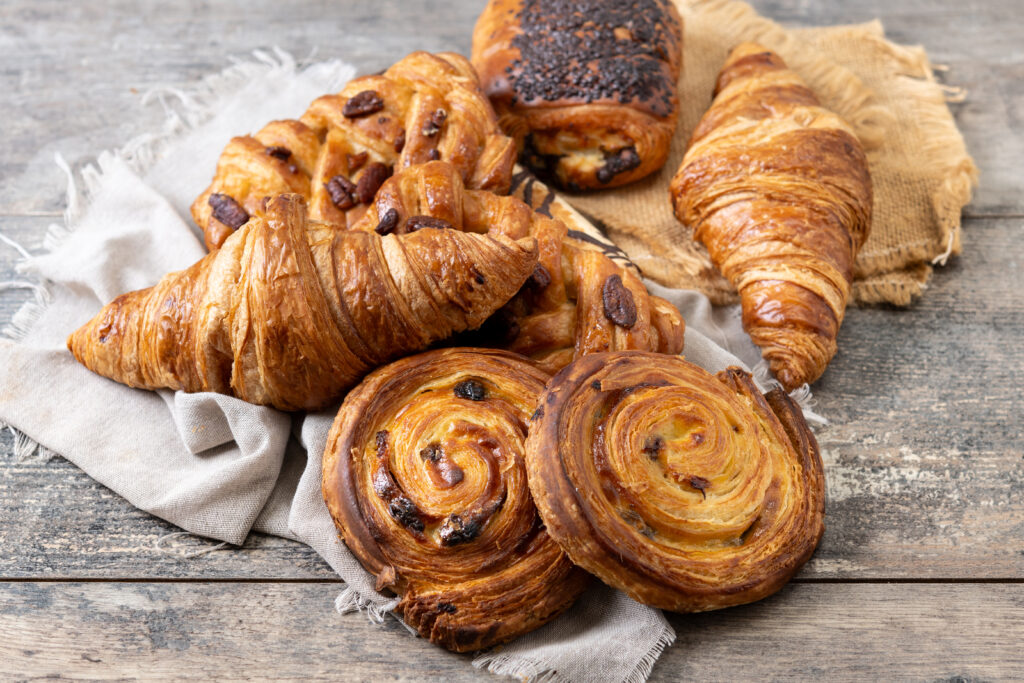
A Delicious Slice of Switzerland : When people think of Switzerland, their minds may jump to chocolate, cheese, and stunning alpine landscapes. But tucked away in the rich Swiss culinary tradition lies a pastry that has won the hearts of Swiss households for generations: the Gipfeli recipe. Often compared to the French croissant, the Gipfeli recipe has its own unique character, offering a slightly less buttery, denser texture that’s perfect for a wide variety of fillings or simply enjoyed on its own.
In this guide, you’ll learn the traditional Gipfeli recipe, including tips and tricks to master the art of making this iconic Swiss pastry. Whether you’re new to baking or a seasoned pro, you’ll be able to create irresistibly flaky Gipfeli recipe that will transport you straight to a Swiss café.
1. The Difference Between Gipfeli and Croissants
At first glance, you might think the Gipfeli is just a croissant under a different name, but there are key differences that set it apart. While both pastries involve a laminated dough and are shaped into crescents, Gipfeli dough is often less rich in butter, which makes it a little denser and slightly more firm than a French croissant. Gipfeli also tends to have a less dramatic rise, resulting in a pastry that’s more structured and a bit heartier.
Knowing these subtle differences will help you appreciate the uniqueness of the Gipfeli recipe and guide you through the process of making them.
2. The Ingredients You’ll Need for the Perfect Gipfeli Recipe

For this Gipfeli recipe, you’ll need a few basic ingredients that you might already have in your kitchen. The key to perfect Gipfeli lies in using high-quality ingredients and following each step carefully.
- All-Purpose Flour: This forms the base of your dough and gives the pastry its structure.
- Butter: Ideally, use European-style butter, which has a higher fat content and adds richness.
- Milk: Used in the dough and for brushing on top of the Gipfeli before baking.
- Active Dry Yeast: To help the dough rise and achieve the right texture.
- Sugar and Salt: Essential for flavor balance.
- Egg: For brushing the Gipfeli to give them a golden, glossy finish.
Now, let’s dive into the step-by-step process of making your very own Gipfeli.
3. Step-by-Step Guide to Making Gipfeli
Making Gipfeli from scratch may seem daunting, but by breaking down the process into manageable steps, you’ll find it’s quite simple. The key is patience, especially when it comes to letting the dough rest and rise properly.
3.1 Preparing the Dough
Start by preparing the dough, which is the foundation of your Gipfeli recipe.
- Activate the Yeast: In a small bowl, combine warm milk (not too hot, or it will kill the yeast) with the yeast and a pinch of sugar. Let it sit for about 5-10 minutes until it becomes frothy.
- Mix the Dry Ingredients: In a large mixing bowl, combine the flour, salt, and sugar.
- Incorporate the Butter: Cut the cold butter into small cubes and add it to the flour mixture. Use your fingers or a pastry cutter to rub the butter into the flour until the mixture resembles coarse crumbs.
- Combine: Slowly add the yeast mixture to the flour and butter mixture, stirring with a wooden spoon until a dough forms.
- Knead the Dough: Turn the dough out onto a floured surface and knead it for about 8-10 minutes until it becomes smooth and elastic.
- Let It Rise: Place the dough in a lightly greased bowl, cover with a clean kitchen towel, and let it rise in a warm place for 1-2 hours, or until it has doubled in size.
3.2 Rolling and Shaping the Dough
Once the dough has risen, it’s time to roll and shape your Gipfeli.
- Roll Out the Dough: Punch down the dough to release any air, then roll it out on a lightly floured surface into a large rectangle, about ¼ inch thick.
- Shape the Gipfeli: Cut the dough into long triangles, roughly the size of a standard croissant (about 7 inches on the base).
- Roll the Triangles: Starting from the wide end of each triangle, gently roll the dough towards the point, creating a crescent shape. If you want a traditional Swiss Gipfeli, you can also tuck the edges inward slightly after rolling to give it a more defined crescent shape.
3.3 Second Rise and Baking
Now that your Gipfeli are shaped, it’s time for the second rise, which will give them their light, airy texture.
- Let the Dough Rest: Place the rolled Gipfeli on a baking sheet lined with parchment paper. Cover with a kitchen towel and let them rise for another 30-45 minutes.
- Preheat the Oven: While the dough is resting, preheat your oven to 375°F (190°C).
- Brush with Egg Wash: In a small bowl, beat an egg with a tablespoon of milk. Brush this mixture over the tops of the Gipfeli to give them a beautiful golden color once baked.
- Bake: Place the Gipfeli in the oven and bake for 15-20 minutes, or until they are golden brown and have puffed up.
4. Tips for Achieving Perfect Flakiness in Your Gipfeli Recipe
The hallmark of a perfect Gipfeli is its light, flaky texture. To ensure your Gipfeli turn out beautifully every time, keep these tips in mind:
- Cold Butter is Key: Make sure the butter you incorporate into the dough is cold. This helps create the layers that result in flakiness.
- Don’t Overwork the Dough: Over-kneading or over-handling the dough can result in tough pastries. Knead just until the dough is smooth and elastic, but no more.
- Patience with the Rise: Let the dough rise fully, both during the initial rise and after shaping the Gipfeli. The slower the rise, the better the texture.
5. Variations on the Traditional Gipfeli Recipe
While the classic Gipfeli recipe is delicious as-is, there are plenty of ways to get creative with this pastry. Here are a few popular variations:
- 5.1 Cheese-Filled Gipfeli
For a savory twist on the traditional Gipfeli recipe, add a filling of grated Gruyère cheese. Simply sprinkle the cheese onto the dough triangles before rolling them up. The result is a delightful cheesy surprise in every bite.
- 5.2 Chocolate Gipfeli
If you’re a chocolate lover, try adding a small piece of chocolate to the wide end of each triangle before rolling. This creates a gooey, sweet filling that’s perfect for a special breakfast treat.
- 5.3 Almond Paste Gipfeli
For a more luxurious take on the classic Gipfeli recipe, you can add almond paste. Spread a thin layer of almond paste onto the dough before rolling, which adds a rich, nutty flavor that pairs wonderfully with coffee or tea.
6. Serving Suggestions for Your Gipfeli
Once your Gipfeli have come out of the oven, allow them to cool slightly before serving. These pastries are best enjoyed fresh, and they pair perfectly with a cup of coffee or a hot chocolate.
For a traditional Swiss breakfast, serve Gipfeli with butter, jam, and honey on the side. If you’re feeling indulgent, try adding a spread of Nutella or a slice of Swiss cheese for an extra treat.
7. Storing and Reheating Gipfeli
If you have leftover Gipfeli (which may be rare, given how delicious they are), store them in an airtight container at room temperature for up to two days. To reheat, simply pop them in the oven at 300°F (150°C) for a few minutes to regain their flakiness.
You can also freeze Gipfeli after baking. To freeze, let them cool completely, then store in an airtight container or freezer bag for up to one month. Reheat them in the oven straight from frozen for 10-15 minutes at 350°F (175°C) for a fresh, just-baked taste.
Conclusion: Your Masterpiece Awaits
By following this Gipfeli recipe, you’re not just baking a pastry—you’re creating a delicious slice of Swiss tradition. With its perfectly flaky layers, golden crust, and rich, buttery flavor, a homemade Gipfeli is an impressive and mouthwatering treat that anyone can master.
So gather your ingredients, roll up your sleeves, and enjoy the process of making this beloved Swiss pastry from scratch. The result will be worth every minute spent in the kitchen, and your friends and family will surely ask for more.


